Create Your First Product
In Product Security Hub, everything starts with a Product. A product represents a device, application, or system that you want to analyze for security. This guide walks you through creating your first product and setting it up for success.
Before You Begin
- You have a Product Security Hub account and can log in
- You know the basic details of the product you want to analyze (name, type, description)
Navigate to the My Product Dashboard
After logging into Product Security Hub, you'll land on your dashboard. From here, navigate to the My Product Dashboard section using the main navigation menu on the left side of the screen.
The Products page shows all products you have access to. If this is your first time, the list will be empty—that's expected!
Click "Add a New Product"
Click the + Add a New Product button. This opens the product creation modal where you have two options:
Option A: Fill Out the Form
Enter product details directly in the modal form. Best for creating a single product.
Option B: Import from Excel
Download a template, fill it out offline, and import it back. Best for creating multiple products at once.
📥 Using the Excel Import
- Click Download Blank Template or Download Pre-Populated Template
- Open the Excel file and fill in your product details (one row per product)
- Save the file and click + Import From a File to upload it
This is especially useful when onboarding an entire product portfolio into Product Security Hub.
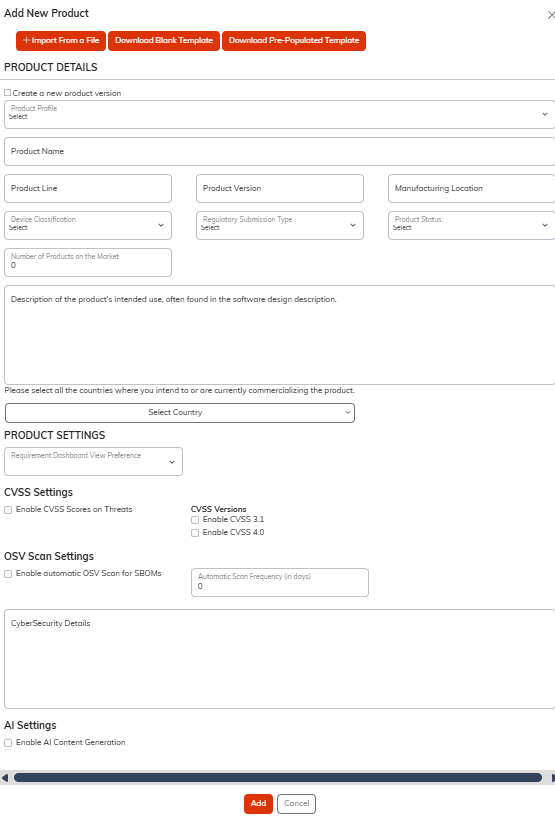
Enter Product Information
If using the form, fill in the product details. The form is organized into several sections:
Product Details
Product Profile
Select a pre-configured profile to auto-populate common settings, or leave blank to configure manually.
Product Name *
A clear, descriptive name for your product (e.g., "Patient Monitor X200", "Infusion Pump Controller")
Product Line
Group related products together
Product Version
The version number of this product
Manufacturing Location
Where the product is manufactured
Device Classification
FDA device class or equivalent
Regulatory Submission Type
510(k), PMA, De Novo, etc.
Product Status
Development, On Market, Legacy, etc.
Target Countries
Select all countries where you intend to or are currently commercializing the product.
Product Settings
Requirement Dashboard View Preference
Choose how requirements are displayed on the product dashboard.
CVSS Settings
Enable CVSS scoring on threats and select which versions to use (CVSS 3.1, CVSS 4.0).
OSV Scan Settings
Enable automatic vulnerability scanning for SBOMs and set the scan frequency (in days).
AI Content Generation
Enable AI-assisted content generation for threat descriptions, mitigations, and more.
💡 Tip: Be specific with naming
If you'll have multiple products in Product Security Hub, use naming conventions that make them easy to identify. Include model numbers or product lines in the name.
Save Your Product
Click the Add button at the bottom of the modal to create your product. Product Security Hub will create the product and add it to your Product Dashboard.
Congratulations! You've created your first product. Click on the product card to open its detail page, which serves as the hub for all security activities.
Understanding the Product Dashboard
The My Product Dashboard gives you an at-a-glance view of all your products and their security status. Each row in the dashboard shows key metrics and quick-access icons to navigate directly to different areas.
Quick Access Icons
Each product row displays status icons that link directly to that product's security areas:
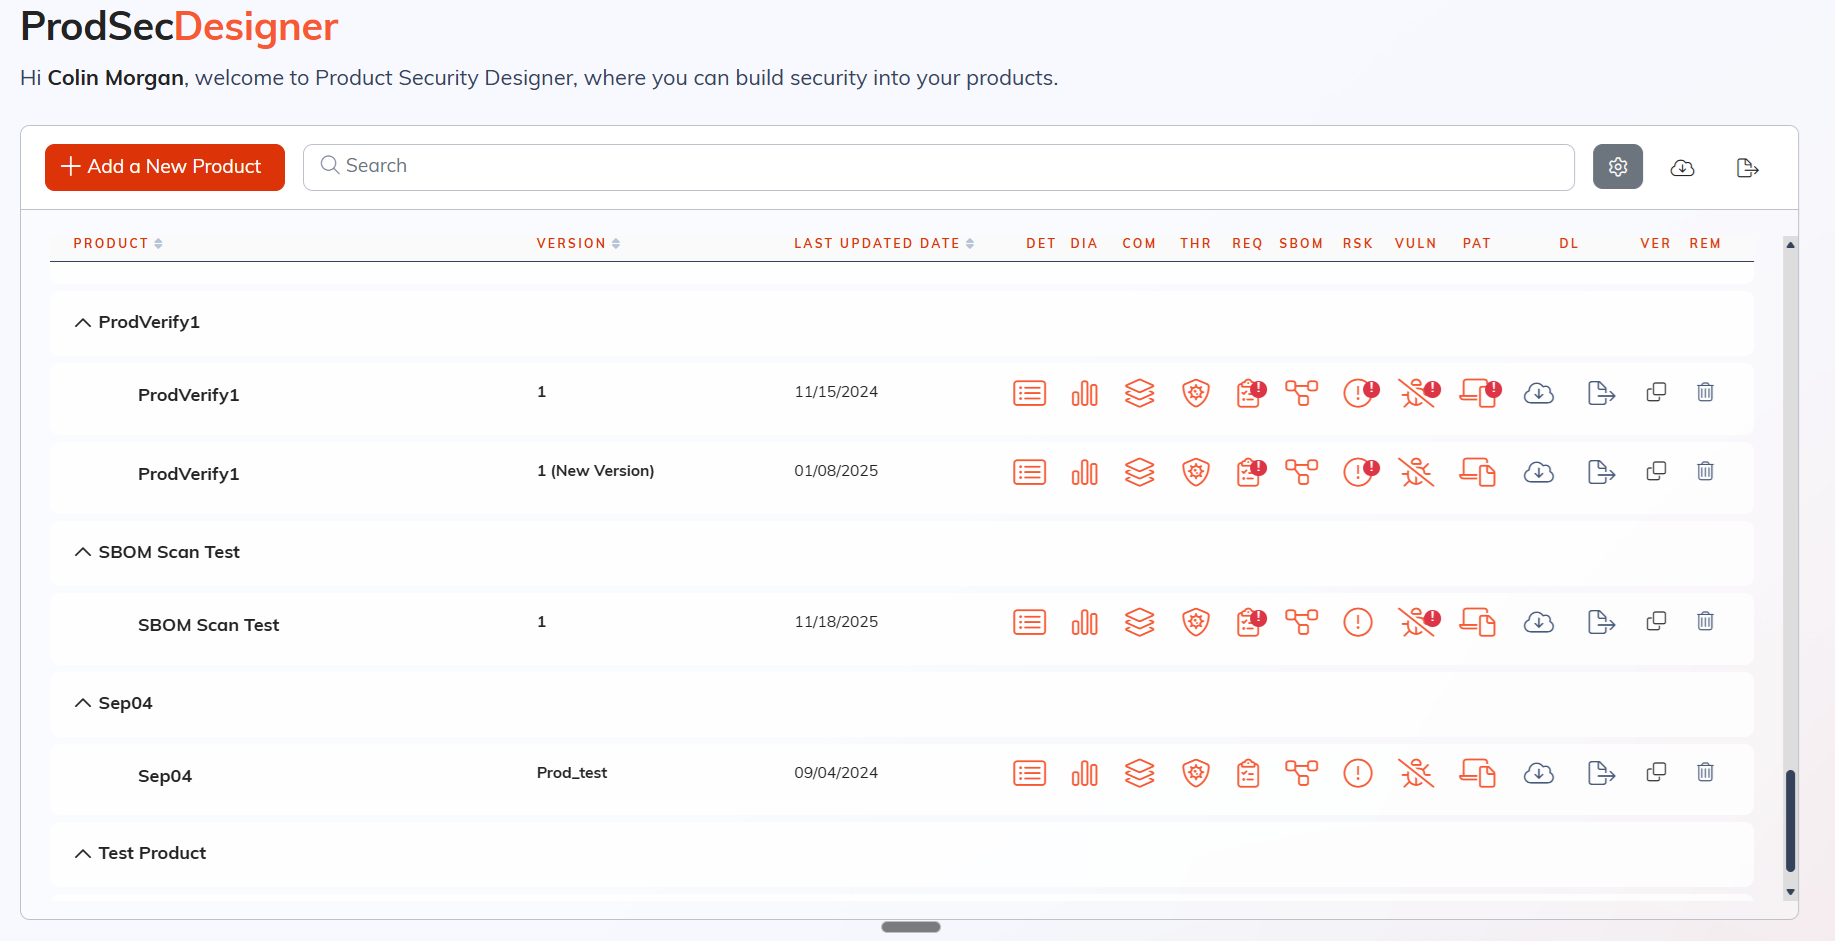
Product Actions
Clone / Version
Create a new version of your product, carrying forward existing security data as a starting point.
Export to Excel
Download a .xlsx file with tabs for each area (Details, Threats, Requirements, Vulnerabilities, etc.). SBOMs are exported separately.
Export to JSON
Download a machine-readable JSON file with your complete product security data. SBOMs are exported separately.
Dashboard Settings
Click the Settings icon on the My Product Dashboard to customize which columns are visible. You can show or hide:
Understanding Product Versions
In Product Security Hub, each product can have multiple versions. Versions let you track the security posture of different releases of your product over time.
Example: If you're building "Patient Monitor X200", you might have versions like:
- •
v1.0— Initial release - •
v1.1— Security patch release - •
v2.0— Major update with new features
Each version has its own SBOM, threat model status, and vulnerability triage state. This lets you maintain accurate security documentation for every release you're supporting.
What's Next?
Now that you've created your product, you're ready to start building out its security profile. We recommend this order:
- 1 Add Components to Your Product
Define your product's components and map them to security profiles
- 2 Build Your Architecture View
Create visual diagrams of your product architecture and data flows
- 3 Run Your First Threat Model
Apply STRIDE-based threat analysis to identify security risks
- 4 Manage Security Requirements
Define security requirements tied to your threats and risks
Need help getting started?
Our team is happy to walk you through your first product setup.